Wordfence Security Firewall, as one of the best WordPress security plugin that helps to filter out malicious requests to the WordPress website. It is a PHP based application-level firewall meant to protect your WordPress site from different types of external attacks.
Though Wordfence Firewall can block background requests to the admin-ajax.php script, but sometimes it may even block some legitimate background requests from some plugins(ex. SiteOrigin Page Builder) or themes to the script and pops an alert to the user with messages like ‘Background Request Blocked’.
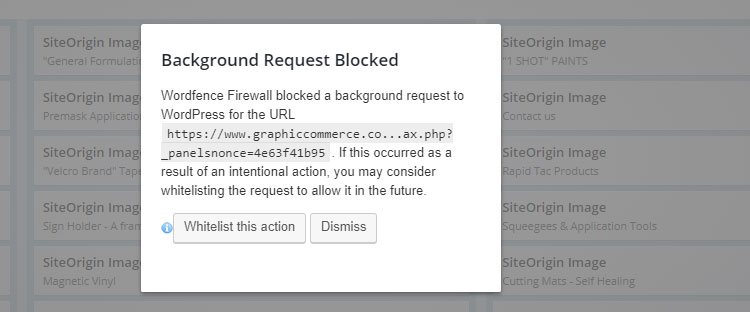
Sometimes it can get a bit aggressive and block you as well!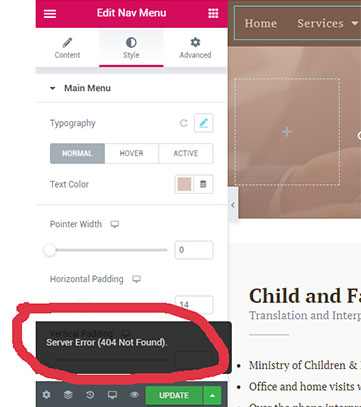 For example, if you are using Elementor Page Builder, the error will look something like this. A similar type of error may happen with other page builders.
Let’s find out how you can help your customers to whitelist those false positives background requests and fix this similar type of issue related to a page builder.
Method 1 – Learning Mode
Usually, when Wordfence is installed for the first time, the Firewall will be in “Learning mode” for 7 days. During these 7 days, the site will not have full protection from the Firewall. Because at this time the Wordfence firewall will monitor your website admin activity and automatically whitelist or minimize “false positives”.
To enable “Learning mode”, follow the following steps.
- go to Wordfence Dashboard.
- From there click on the “Manager Firewall”.
- Finally, from the “Basic Firewall Options” section, set the “Web Application Firewall Status” to “Learning Mode”.
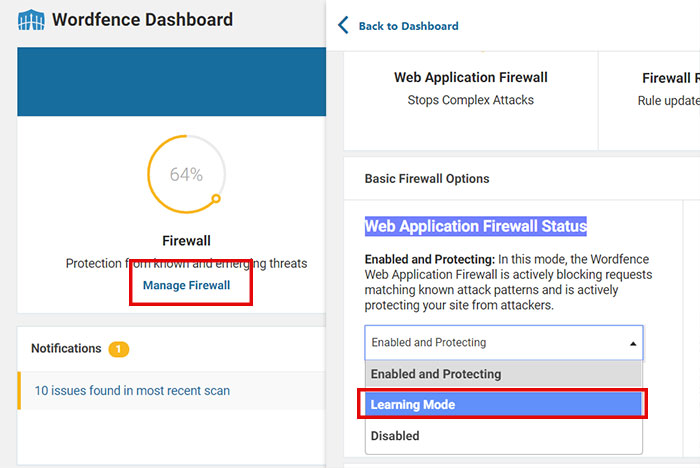
When installing or updating a new plugin or theme, multiple actions may be blocked. in that case, we can manually turn on “Learning Mode” again until any necessary parameters are whitelisted. and after reviewing the page or action that was being blocked set the “Web Application Firewall Status” back to “Enabled and Protecting”.
Method 2 – Whitelist admin-ajax.php
- go to Wordfence Dashboard.
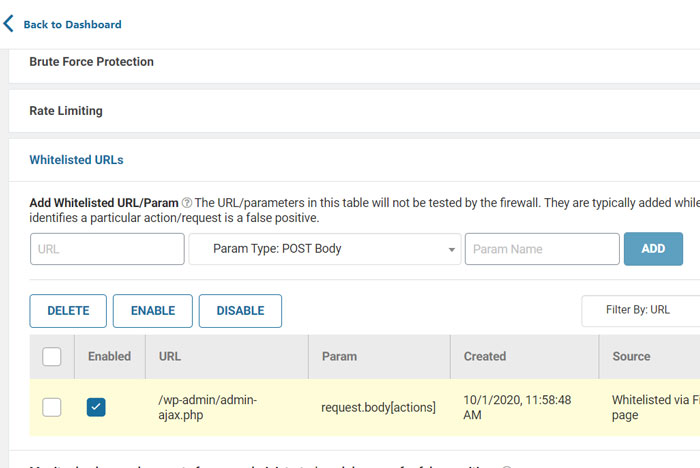
- Go down to the “Whitelisted URLs” section
- Enter
/wp-admin/admin-ajax.phpin the URL box - Select
Param Type: POST Bodyfor the dropdown - Enter
actionsfor the Param Name - Next, click the ADD button
- Finally, click the SAVE CHANGES button in the top right corner
That’s it! I hope you found these solutions useful to solve the Wordfence lockout issue and enjoy the full benefit of the Wordfence plugin.


Leave A Reply